Understanding Kubernetes (Basics)
So yeah, you have an amazing app(I am gonna assume it is in python) that you would like to deploy.
You know how to deployment works. You spin up an instance on gcloud or aws or azure or somewhere else.
You install python, no python3, then pip install requirements.txt. Set up your database, maybe redis.
Now you make sure firewall rules are ok if you are deploying on some other port and you start the app and probably even
set up nginx infront because that is what good developers do. Good to go, right?
Well, that is how you would normally do. Now let us see how we do it using Kubernetes.
Btw, I'ts the future from circleci a great read.
Basics #
Moving on to how to actually use Kubernetes. I will initially flush out the basic concepts, then go into a simple explanation of how to deploy your stuff.
You can think of Kubernetes as a collection of different types of wrappers(which has a hierarchy) that you can configure and put on top of others. The lowest layer is your container which you put in a thing called a pod.
The simplest stack can be:
- pod
- deployment
- service
A pod is the simplest thingy. It is just your container wrapped in a Kubernetes object(that is what Kubernetes called each of these wrappers).
Right on top of that you have a Deployment. Deployment is what manages pods(pods not pod).
The idea here is this Deployment object is what takes case of things like checking to see if your pod is alive, restart
it, maintain the number of replicas needed, etc.... You can specify something like I need 2 pods always or I need a minimum of 2
pods but scale up to more if there is a heavy load. This can be really useful if you have seasonal traffic. We will go
into detail as to how to do this later.
Now, on top a Deployment you have a Service. A service is what helps you expose your app to the outside world.
Think of it as putting nginx infront of your app if thas helps. You will most likely be using a Service as load
balancer. You could also be using it just to expose your Deployment. For that we use something called a NodePort.
Deploying your app to a Kubernets cluster #
Well, let us get to the fun part and deploy your app to a Kubernetes cluster.
Creating a Kubernetes cluster and setting up kubectl #
First thing you will need is kubectl which you will have to install.
On macOS with homebrew it is as easy as brew install kubernetes-cli.
Well you are gonna need a Kubernetes cluster to experiment with.
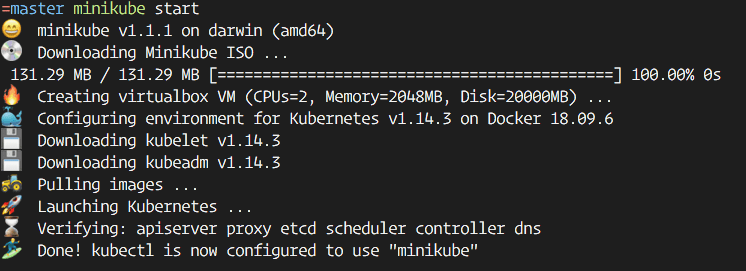
There is this thing called minikube which you can use
inorder to test out Kubernetes locally. It pretty much sets up a VM in your machine and makes it your Kubernetes cluster
with one node(VM instance). Just run minikube start to start minikube.
You will need to connect your Kubernetes cluster to kubectl. When you run minikube start it will set up the cluster
and connect it to kubectl. When creating a Kubernetes cluster using gcloud or aws you will have their own way in which
you can connect it to kubectl.
Deploying your app #
I have really simple flask app that needs to be deployed. Here is the app that we have to deploy.
The first step to getting something onto your kubernets cluster is to have a Dockerfile. You can see the Dockerfile that I am using in that folder.
You build your docker container, then using a Deployment you set up pods.
Build Docker container #
Firstly build your Docker container by running the following command in the flaskapp dir.
docker build -t docker.io/meain/flaskapp .
                          -----
                    dockerhub username
replace
meainwith your dockerhub username
This command will build your docker container and tag it with docker.io/meain/flaskapp.
You tag the image with the location where you need to push the image to.
Test your docker container #
You can start your docker container by doing docker run --rm -p 8080:8080 docker.io/meain/flaskapp.
This will start your docker container and map the internal 8080 port to the 8080 port in your local machine.
$ docker run --rm -p 8080:8080 docker.io/meain/flaskapp
 * Environment: production
   WARNING: This is a development server. Do not use it in a production deployment.
   Use a production WSGI server instead.
 * Debug mode: off
 * Running on http://0.0.0.0:8080/ (Press CTRL+C to quit)
172.17.0.1 - - [26/Jun/2019 05:58:36] "GET / HTTP/1.1" 200 -
$ curl localhost:8080
Hello, World!%Pushing your image #
When deploying, you will have to push your docker image to some remote location and give that location for image. There are multiple services which let you upload your docker images. Google has gcr.io or you could just use hub.docker.com.
You could push your docker image using:
$ push docker.io/meain/flaskapp
Let us deploy already #
OK, now that we are tested and ready, let us deploy to Kubernetes.
You can set up a deployment using:
$ kubectl run flaskapp --image='docker.io/meain/flaskapp' --port 8080
             ---------          ------------------------
          deployment-name            image-location
You can choose any deployment name, it does not have to be the same.
Now that you have created a Deployment object, you can query Kubernetes to see that stats.
$ kubectl get pods
NAME                        READY   STATUS    RESTARTS   AGE
flaskapp-576b787759-4jmd2   1/1     Running   0          3m47s

$ kubectl get deployment
NAME       READY   UP-TO-DATE   AVAILABLE   AGE
flaskapp   1/1     1            1           3m51s
Now to set up a Service object and expose the deployment. You can do that using:
$ kubectl expose deployment flaskapp --type=LoadBalancer --port 80 --target-port 8080
                            --------
                          service-name
This will set up a service called flaskapp with type as LoadBalancer. It maps the pod's 8080 port as the port 80 of
the service.
Testing your deployed service #
Now that we have everything deployed, let us test it out.
Well you could just do a curl, but to which address.
If you run
$ kubectl get service
NAME         TYPE           CLUSTER-IP     EXTERNAL-IP   PORT(S)        AGE
flaskapp     LoadBalancer   10.99.64.231   <pending>     80:31852/TCP   3m29s
kubernetes   ClusterIP      10.96.0.1      <none>        443/TCP        59m
It will list of the services. For services like gke or eks, you will have some value in the EXTERNAL-IP field.
But when using minikube you will only have a CLUSTER-IP.
So, when using with gke or eks, you can just curl to that location.
When using minikube, you create another pod and then use the internal IP.
You can create a tiny pod using the following command. Think of it as ssh ing into a VM instance in the cluster.
$ kubectl run curl --image=radial/busyboxplus:curl -i --tty
once you are in, you can do a curl the internal ip
$ kubectl run curl --image=radial/busyboxplus:curl -i --tty
If you don't see a command prompt, try pressing enter.
[ root@curl-66bdcf564-4p9lb:/ ]$ curl 10.99.64.231
Hello, World!
Scaling your service #
You can easily scale a deployment using kubectl. In order to scale our flaskapp deployment to 3 pods we can run.
$ kubectl scale deployment flaskapp --replicas 3
deployment.extensions/flaskapp scaled
Now, if you check number of pods, you can see 3 pods running.
$ kubectl get pods
NAME                        READY   STATUS    RESTARTS   AGE
flaskapp-576b787759-4jmd2   1/1     Running   0          39m
flaskapp-576b787759-8bhdc   1/1     Running   0          84s
flaskapp-576b787759-kdps9   1/1     Running   0          84s
...
Awesome, right?
OK, now autoscaling. It is just as easy. You can run:
$ kubectl autoscale deployment flaskapp --min=1 --max=5 --cpu-percent=50
horizontalpodautoscaler.autoscaling/flaskapp autoscaled
Now with that, it will scale up from 1 pod to a max of 5 pods based on the cpu-percent. [no of nodes = ceil(cpu-percen/50)]
Deleting stuff #
Well, it is really easy to delete your deployment or service. You can run:
kubectl delete pod <pod-name>
kubectl delete deployment <deployment-name>
kubectl delete service <service-name>
Well, that is pretty much the basics.
Writing config files #
Well, all this is pretty cool. But, you probably don't wanna retype the entire command with all the parameters every time you wanna deploy something or make some changes. That is exactly why you have a config file.
You can have a config file for any kind of kubernetes object. It is a yaml file which will essentially specify the parameters which you would be specifying in the command that you would enter.
You could have config for multiple kubernets object in one file, you will just have to seperate it with
---.
I am not going into all the configuration options that you can do because it is pretty vast, and it is bettter that you just go through the documentation for kubernetes.
I will go through the config for a deployment and a service.
Deployment (Sample config) #
To do the same deployment as what the command above, we will be writing a config file which looks something like this:
apiVersion: apps/v1
kind: Deployment
metadata:
    name: flask
spec:
    selector:
        matchLabels:
            app: flask replicas: 1
    template:
        metadata:
            labels:
                app: flask
        spec:
            containers:
            - name: flask
              image: "docker.io/meain/flaskapp"
              ports:
              - name: backend
                containerPort: 8080
Let me introduce you to the important pieces. Almost every kubernetes config piece will contain these things:
apiVersion: the version of the kubernets configkind: kind of object that you are working withmetadata: things likename,namespace,labels, etc...spec: the spec of the deployment, as in which pod, how many replicas etc..
You use labels or name to link between different objects
The template section of a deployment could be actually defined in a Pod object and connected via labels.
In this case, if we were to separate out the two, we could have the template section in a different file and have this Deployment config linked to it
by using selector > matchLabels in the Deployment section and matching it to metadata > labels in the Pod section of that config.
But in this case we just specify the Pod specification directly in the Deployment piece.
In here the spec for Deployment specifies:
selector: specify labels used to select thePodreplicas: how many replicas of the pod to usetemplate: this specified the pod definition (could have been taken out in to a separate piece if needed)
The template section actually contains the Pod definition.
It will have your metadata section, but don't need others like apiVersion, kind etc as they are already know.
apiVersion as it is specified for Deployment and kind can be inferred from the fact that this a template in
Deployment config.
So the Pod spec contains:
container: the pod specificationname: name of the podimage: docker image linkports: ports to be exposed
Well that is pretty much it for a Deployment config.
Now here is a sample Service config.
Service (Sample config) #
apiVersion: v1
kind: Service
metadata:
    name: flask
    labels:
        app: flask
        tier: backend
        track: stable
spec:
    selector:
        app: flask
        tier: backend
    ports:
        - protocol: TCP
          port: 80
          targetPort: backend
    type: LoadBalancer
Here, again you have the same labels like apiVersion, kind, metadata etc...
But the spec section changes.
For the spec of a service we define things like:
ports: ports to be connected totype: type of service
There is a lot more things that the spec section of Deployment or Seervice can handle. You can look them up in the
documentation for kubernetes. But this is the essential idea.
Using config files #
OK, now you have the config files. How to use them?
You can either run:
kubectl apply -f <config-file> or kubectl create -f <config-file>
The only difference is that if you use create, you will not be able to change the config later.
With apply, you could change the file later and run the same command again to apply only the changes that you have
made.
Other resources #
- Kubernetes Documentation
- Deploying a containerized web application
- How to Set Up an Nginx Ingress with Cert-Manager on DigitalOcean Kubernetes
With that, I'm out. You are on your own now. But I guess that it helped out a bit.